Spaces & Resources
Our college provides a range of resources that foster experiential learning and collaboration, offering students and faculty the tools and spaces to explore, create, and innovate together.
A+A Building
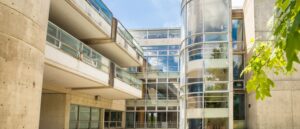
Our award-winning building, affectionately called “the A+A,” houses administrative and faculty offices for the College of Architecture and Design, as well as 450+ individual student workstations in open studio spaces. The building also features an auditorium and lecture halls, a woodshop and fabrication space, a gallery, exhibition and review spaces and an amazing atrium flooded with natural light and open to the ceiling four floors above.
Bruce McCarty, founder of local design firm, McCarty Holsaple McCarty Architects and Interior Designers, along with his son, Doug McCarty (’73), constructed the A+A as part of a design competition. It is more than 160,000 square feet, and the atrium, which runs the full length of the building, is about 360 feet long.
Fab Lab
Contributing to downtown Knoxville’s urban renewal, our Fab Lab is a 20,000-square-foot maker studio in a renovated historic building; though, there’s nothing old about the Fab Lab.
 Our makerspace, equipped with a large robotic workcell, CNC routers, CNC metal, waterjet & laser cutting and 3D printers, offers students fabrication tools that elevate their design education.
Through rapid prototyping, students’ designs move from flat computer screens to models in their hands, not over days, but in mere hours. Two levels of fabrication resources allow students to create with many substrates, from wood to plastics and from titanium to ceramics. This is an experience they couldn’t get anywhere else.
Inside the Fab Lab
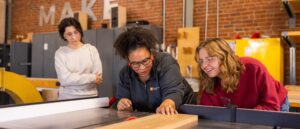
A dynamic, multidisciplinary maker space, the Fab Lab provides students the opportunity to develop traditional craftsman skills while engaging with cutting-edge technology.
-

-

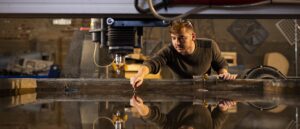
The lab’s large-scale industrial robotic arm provides a platform for exploring automated fabrication and experimental structural forms.
-

A dedicated bank of Bambu Lab 3D printers allows students to iterate designs quickly and produce intricate component models.
-

A ShopSabre CNC router stands ready for complex builds, controlled by dedicated software to ensure architectural-grade precision.
-

Students transition from physical prototyping to digital modeling at a communal workspace, flanked by high-end laser cutters and 3D printing stations.
-

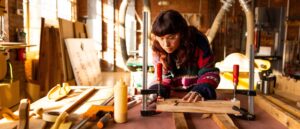
Students engage in hands-on learning, utilizing traditional woodworking machinery and expansive workbenches in the sun-drenched main shop.


Fabrication Intranet
An internal resource for faculty and students in our college for fabrication services.
 Digital Futures Lab
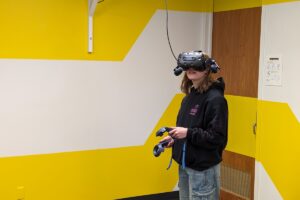
The Digital Futures Lab, or DFL, is a studio space designed to facilitate research, experimentation, and project development in emerging digital technologies such as virtual reality and augmented reality. In addition to immersive technologies, the lab features a fully equipped video studio, making it an ideal space for recording a wide range of content, from lectures and presentations to demos, vlogs, and podcasts.
Digital Print Center
The Digital Print Center, or DPC, is a self-service print center that is maintained by the college to provide near 24/7 operational support for both large-format plotters and small-format printers. Within the DPC, college members have access to self-service large-format plotters, a large-format scanner, laser cutting machines, cloud-operated 3D printers, and other specialized tools. In addition to this equipment, the DPC also supports various small- and large-format systems throughout the A&A building and the Fab Lab.
Digital Printing Intranet
An internal resource for faculty and students in our college for digital printing services.
Woodshops
We offer two wood fabrication studios as resources to our students; one located in the A+A and one in the Fab Lab. Here, you can use a variety of stationary, hand, and power tools to experiment with design and materials, fabricate models, build furniture and more.
The A+A’s shop is about 3,600 square feet and equipped with a Thermwood 3-axis CNC router, a horizontal panel and sawstop table saw, helix planer, and more available to all students. In the Fab Lab woodshop, students have access to CNC routers, many fixed, electric, and pneumatic power tools, and much more.
From these incredible resources, you learn skills you can’t learn anywhere else, which prepares you for your career and supports your design passion.